Including: |
    Future
Craft Lesson Pictures Future
Craft Lesson Pictures |

Including: |
    Future
Craft Lesson Pictures Future
Craft Lesson Pictures |

|
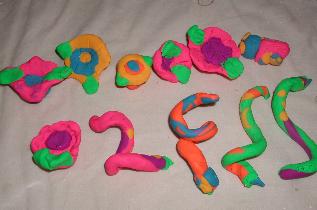
SCULPEY ERASER CLAY SNAKES AND FLOWERS A preschool lesson.  I used this in a class of 3 and 4 year olds.
Pictured are flowers, snakes and a animal shaped car. Supplies For class of 12: There were a few left over. A tooth pick or metal pointed clay tool. Remember if you use a baking dish for clay baking not to use it for food. (optional to cover the bottom of the dish.) | Directions:
HAVE CHILDREN WASH HANDS BEFORE AND AFTER THEY WORK WITH POLYMER CLAY! I gave only a half of a piece of clay to each child to play with and to condition. We talked about what we were going to make and used the pictures on the kit for ideas. Each child was given a piece of wax paper to work on. They decided what they wanted to make. I gave them small pieces to work on for accent colors. They made their shape and used fingers to impress lines for decorations. (Their idea.) When finished I carved their initials into the bottom for identifying them after baking. I also pushed a pencil into the bottom to make the hole to use later for those that made pencil topping erasers. I twisted the smakes around a pencil for those that made an snake eraser to go around a pencil. Baked in oven per box instructions. This clay tended to crack or crumble if the child had not warmed the clay enough. With it being winter a few of them really did not have warm hands. Some children just did not keep the clay in a ball or snake shape to warm up. I had to reshape the snakes a few minutes with a few of them before baking. This is a real easy craft but could be a more complicated lesson with older children. I think even teens would love to shape their own erasers. |