Including: |
    Future
Craft Lesson Pictures Future
Craft Lesson Pictures |

Including: |
    Future
Craft Lesson Pictures Future
Craft Lesson Pictures |

| See my BEADIE PAGE, for basic
instructions. | Also see my Bible and Jewish Holiday Bead Projects Page. Mini Bead Regular Bead Stars 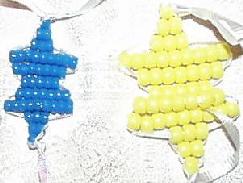 49 beads. |
3 feet of cord or curling ribbon. Make sure to keep the ribbon/cord loose when you get to row 3 and after 7 to allow for the longer rows. Otherwise it will curl.
To see great instructions and diagrams with arrows explaining how to make my design in blue and white beads etc. see Making friends.com Eileen's Star of David Pattern. Shofars 3 small ones designed by Ronin age 9 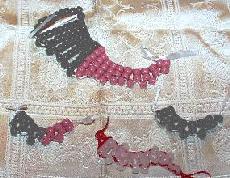 Large Shofar: |
53 Black. 38 pink.(We were out of good colors Shofars are Brown, Black, Beige and combinations for the natural horn. Use your imagination.) 7 feet of cord
Small Black Shofar: The bumps of the horn are made by not doubling through(skipping ) one bead as you start the next row. To Twist like a Yemenite Horn alternate sides of rows for the skipped bead. See Ronin's all glow in the dark one in middle of small pictures. 3D Star ADVANCED LEVEL: 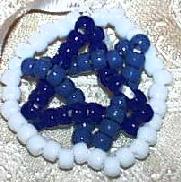 3D designs can be
tricky. |
30 white beads String on 16 white beads on each cord. |
Boy with Yarmulkah Designed by Ronin age 9 |
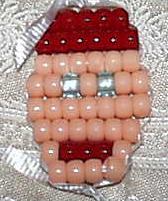 | 14 Red beads. 30 skin color beads. 2 beads for eyes. 3 feet of cord. |
Mezzuzah |  | The Mezzuzah's picture
just did not come out as clear as we would like. The rows are : first row 1,
second row 4, third row 5. 44 Yellow. 11 blue. 3 feet of cord. |
Tallit/Tallis Designed by Micah age 7 |  | Micah used glow in the dark beads. SO they
started to glow when his ABBA scanned them! Tallit are often white with stripes.
The blue band is the neck piece where the prayer usually is. He put extra ribbon
for the fringe.
16 beads color 1. |
 Color Changing Large Beadie Tallit | Beadie Tallit
Pattern - designed in honor of Rosh Hashana for
Shalom Boston.com. (Designed by Eileen's son Micah now age 11.) Clicking on the picture will take you to Shalom Boston.com you will have to click back to get back to this page when you are done. | STAR | ADVANCED LEVEL: |
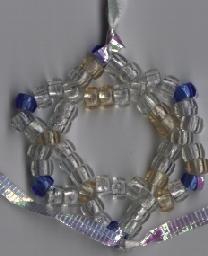 | I had to laugh when
I saw the colors of the beads in this picture! We used a computer scanner instead of a digital camera and it seems to have added a lot of light. I thought I used all clear and transparent blue. Some must have been color changing or gold. Plus I skipped a clear bead and if you count the beads in the picture carefully, you will catch my mistake. Oh well.. The directions here are a bit complicated! 6 light blue beads. 48 clear beads. 2 feet if ribbon. 1. String on one blue bead on one cord. Double back through. 2. String on 5 clear beads on one cord. 3. String on one blue bead on same cord and go back through with the SAME cord. 4. Repeat steps 2 and 3 - two times. 5. Take other cord. 6. Repeat steps 2 and 3 - three times. 7. Twist and tie the two cords to make a circle.(You made the outer circle) 8. Weave one cord back through 3 clear beads on left. 9. String on 3 clear beads. 10. Go through the center clear bead(the third one)of the outer circle. 11. Repeat steps 9 and 10 - six times. 12. Weave back through the 2 clear and one blue of the bottom left center. 13. Tie off. Pat your self on the back! |
|
|